Documents
![]() Instruction > Document Center > Documents
Instruction > Document Center > Documents
Edition: Supply Chain Platform – Lite ; Supply Chain Platform – Basic
Function
Collect all types of documents here for reference when filling out the form.

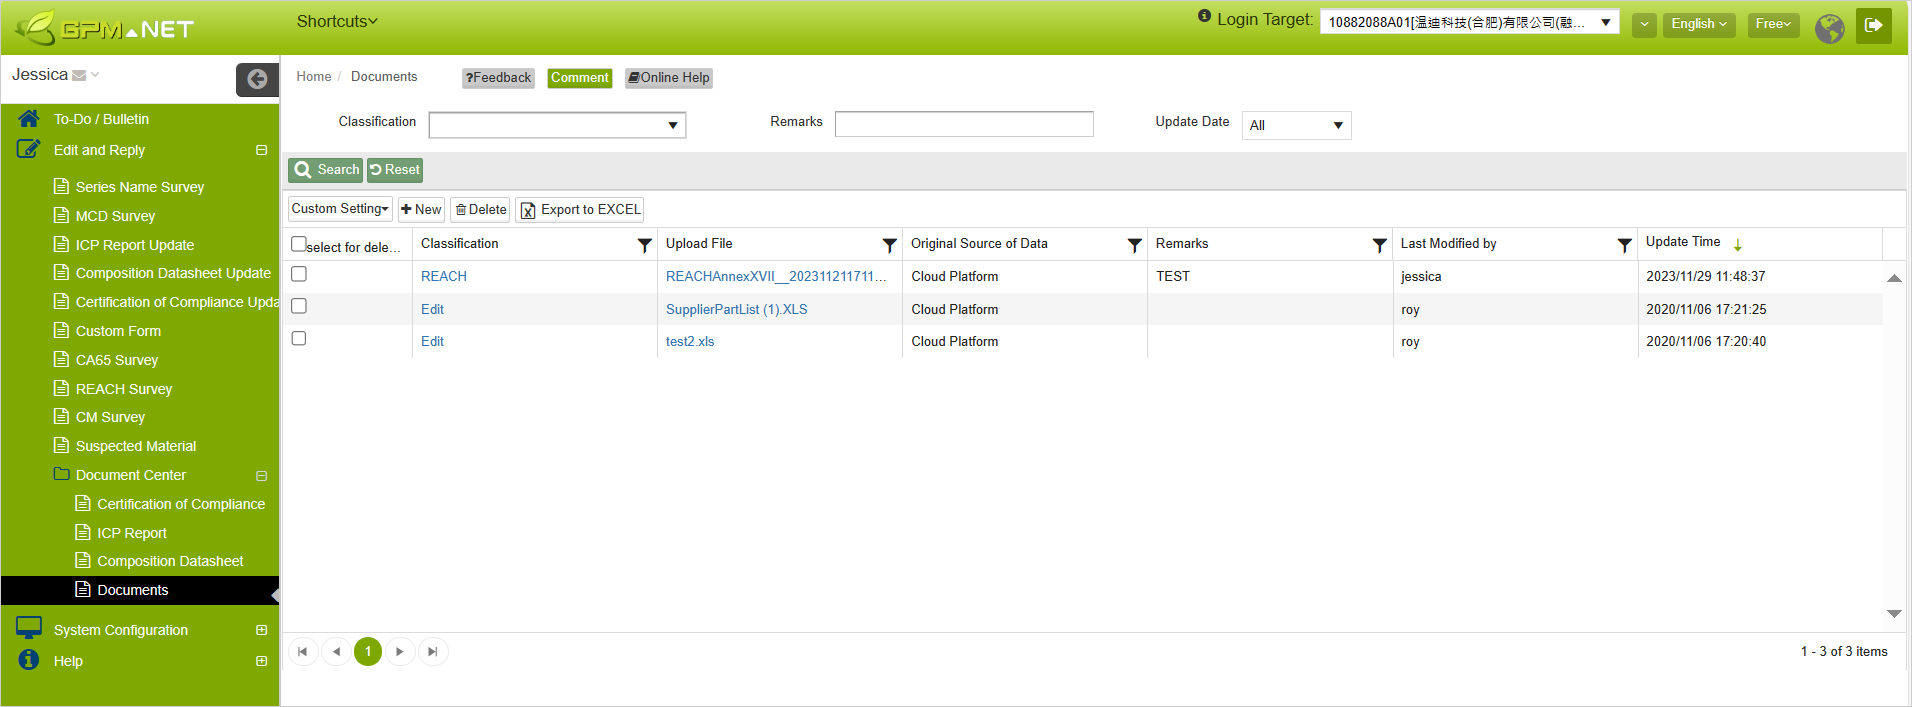
Main Page - Searching Columns
Searching Condition
You can set multiple different search criteria to query specific ranges within the document library records. Here are the relevant setup instructions:
| Column | Description | Remark |
|---|---|---|
| Classification | "Users can categorize documents on their own. The system defaults to categorizations such as REACH and CA65. | 可以篩選 |
| Upload File | The documents uploaded to the system. | |
| Remarks | Supplementary description of the document. | |
| Original Source of Data | The data is sourced from the cloud or the respective buyer. | 系統資料 |
| Last Modified by | The personnel who recently updated the document. | |
| Update Time | The most recent modification timestamp of the document. | 可排序 |
The various search criteria above can be left unset (to query all data) or multiple conditions can be set. The system will identify specific data that matches all set conditions. Once configured, click ![]() to execute the search. To clear all configured search conditions, click
to execute the search. To clear all configured search conditions, click ![]() to reset.
to reset.
Searching Results
Search results from the document library will appear in the table at the bottom right. You can manage individual records as needed, or follow the methods below:
- Click on the title of the selected field to sort by particular order.
- If you want to filter data based on specific conditions, you can click the filter button
 on the right side of the title field to set individual conditions as query results for further filtering.
 - Click
 to export the searching results in excel.
If you want to know the detailed query function operation, please refer to General User's Interface.
Add custom document
Custom documents are among the components used to respond to custom form surveys. You can directly create them within the document repository for easy referencing across various custom form surveys. The steps to add a custom document are as follows:
Add Custom Document
- After logging into the ezGPM.NET platform, click on the left-hand menu "Edit and Reply > Document Center > Document".
- In the main operating interface on the right-hand side of the system screen, click on the
 icon to open the window for creating a new custom document repository."
Complete Custom Document - Basic Information
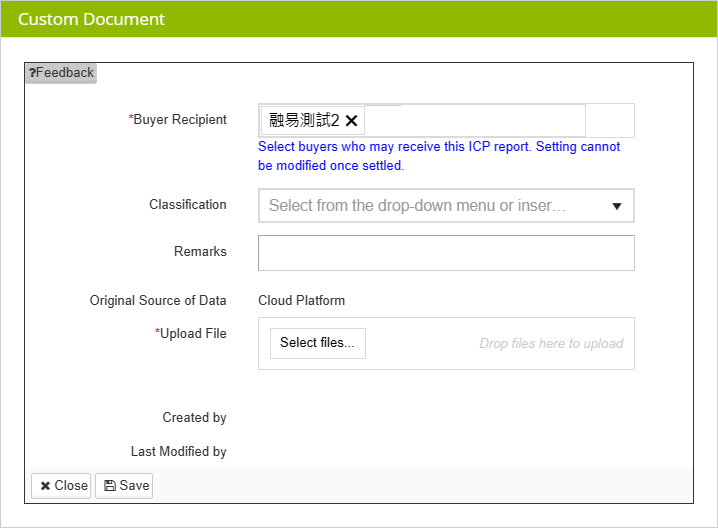
- In the data window of the custom document, here are explanations for filling in or selecting data in each field:
| Column | Description | Remark |
|---|---|---|
| Buyer Recipient | The target recipients of this document. | Cannot be blank |
| Classification | The system allows users to categorize documents according to their preferences. The default categories provided by the system are: REACH and CA Prop65. | |
| Remarks | Document Supplementary Explanation. |

- In the Upload Files field, click on
 to choose the files you intend to upload into the system.
 - After filling in the data and selecting files, click on the
 button at the bottom left of the window to complete the process of adding a new file to the custom document.
 - After completion, you'll see
 message at the bottom left of the window. At this point, you can click
  to exit this operation and return to the main screen, or click
  to continue adding new files to the custom document.
The problem with saving failure When saving, if some fields are mandatory and left incomplete, at the bottom of the window, you'll see
message. Under the fields that require completion, you'll notice
prompts. Simply follow these prompts to fill in the necessary information, then click
again to submit the data.
If two suppliers are categorized by the buyer as the same operational entity, both suppliers can simultaneously add their data to this document. Additionally, when filling out forms, they can reference each other's information.
After the approval of files uploaded for the [REACH survey / CA65 survey, as well as the batch replies for REACH uploaded on the computer, they will be simultaneously stored in the Document Center - Document upon approval, and categorized under the respective [classification].
